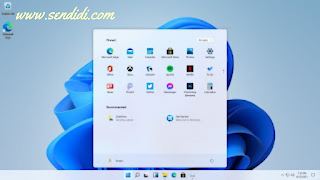
Customizing the taskbar and start menu in Windows 11
We cannot deny that the new version of the Microsoft operating system radically changes everything. There are many of us who would like to update to this new version, but maybe too many aesthetic changes can affect a lot, so how can we solve it? We can do this by customizing the taskbar and start menu in Windows 11.
This way, we will feel more at ease, as if the change wasn't drastic from moment to moment, at least until we get used to the new features of Windows 11.
Move the Windows 11 taskbar icons to the left
Taskbar settings.
The first thing we need to do is right-click on the taskbar and then click on Settings.
Move the icons to the left on the Windows 11 taskbar.
A window opens where we will have several configuration options. From the left sidebar we will have to select “Personalization” and look for the “Taskbar alignment” option and simply click on the drop-down menu to choose “Left”.
Customizing the Taskbar and Start Menu in Windows 11:
In this simple way, all icons will move to the left, in the same way as in Windows 10.
Customize the Windows 11 taskbar to look like Windows 10
The first thing to consider is that in Windows 11 there is no option to edit the taskbar and it remains the same in Windows 10. Therefore, we will have to edit the registry to achieve this. We'll need to create a registry backup before we get started.
To get started, we will have to press “Windows + R” to open the Run dialog and then we will type “regedit” without the quotes, then press “Enter”.
Windows registry.
The Registry Editor opens, so we will have to go to the next path through the left sidebar.
HKEY_CURRENT_USER\Software\Microsoft\Windows\CurrentVersion\Explorer\Advanced
Create a new value in the registry.
Once we are in Advanced we will have to right click on an empty area on the right side of this window and we will choose New and choose DWORD Value (32-bit) to create a new value we will call Start_ShowClassicMode
Edit the registry value.
Then we will have to double click on Start_ShowClassicMode and set the value to 1, now we press OK.
The only thing left is to restart the computer. When you launch the Windows 11 start menu again, it will be the same as the Windows 10 start menu.
In the event that you want to go back to the Windows 11 start menu, we will have to repeat all the steps, but you will simply have to delete Start_ShowClassicMode and restart your computer, this way you will have the Windows 11 start menu again.
Customizing the Start Menu in Windows 11:
As you can see, it is very easy to customize the taskbar and start menu in Windows 11 so that they are very similar to Windows 10. This way the change between versions of the Microsoft operating system will be less impressive.


Comments
Post a Comment